
hyper tough 20 inch lawn mower manual
Hyper Tough 20 Inch Lawn Mower Manual: A Comprehensive Guide
This manual provides essential guidance for operating and maintaining your Hyper Tough 20-inch mower, ensuring optimal performance and longevity of your new equipment․
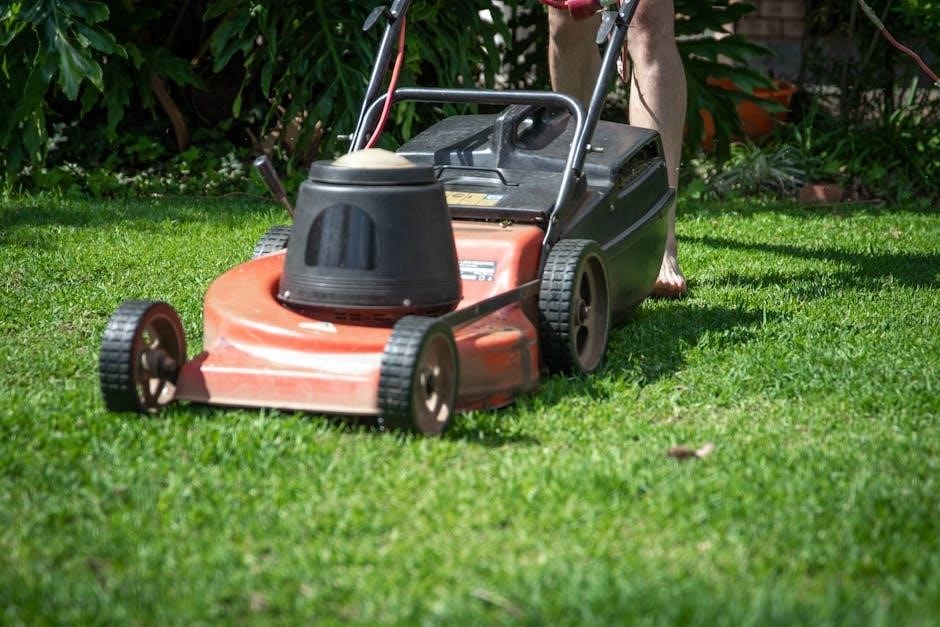
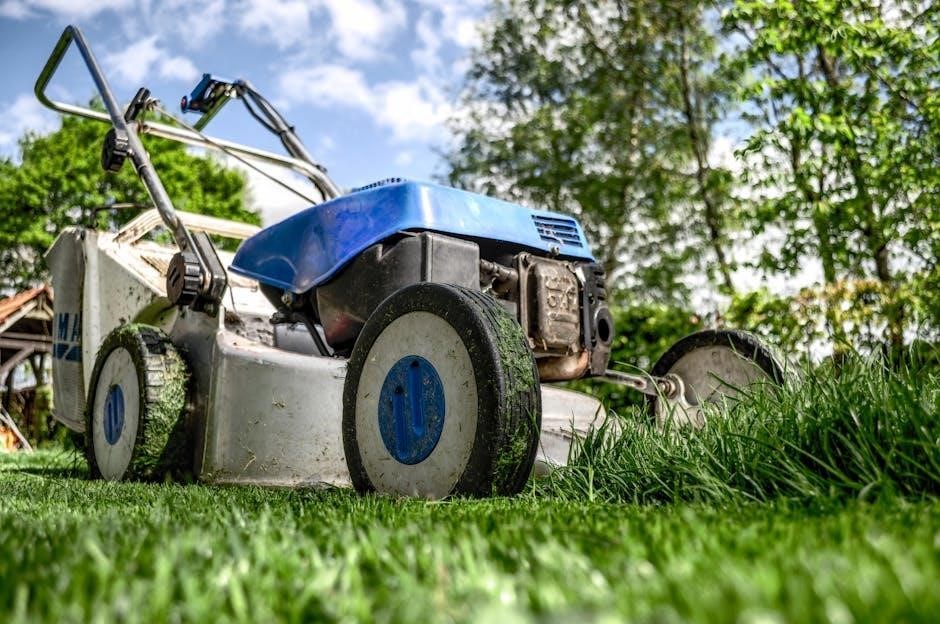
Welcome! Your new Hyper Tough 20-inch lawn mower, proudly manufactured by DNA for Walmart, represents a commitment to quality and affordability in outdoor power equipment․ This mower is designed for residential use, offering a reliable solution for maintaining a well-kept lawn․
The Hyper Tough line aims to deliver dependable performance without compromising on value․ This particular model features a 125cc engine, providing sufficient power for most standard lawn care tasks․ Before first use, carefully review this manual to familiarize yourself with its features, operation, and safety guidelines․
Proper understanding of this mower will ensure efficient mowing and extend the life of your investment․
Understanding the Manual’s Purpose
This manual serves as a comprehensive resource for all aspects of your Hyper Tough 20-inch lawn mower․ Its primary purpose is to provide clear, concise instructions for safe and effective operation, maintenance, and troubleshooting․ Carefully reading this guide before assembly and use is crucial for preventing accidents and maximizing the mower’s lifespan․
Within these pages, you’ll find detailed explanations of safety precautions, assembly steps, operating procedures, and a maintenance schedule․ The manual also includes a parts diagram to aid in identification and replacement․
Understanding the warning symbols – DANGER, WARNING, and CAUTION – is paramount for safe operation․ Keep this manual readily accessible for future reference․
Safety Precautions & Warnings

Prioritize safety when operating your Hyper Tough 20-inch lawn mower․ Always read and understand all warnings and instructions detailed in this manual before use․ Keep bystanders, especially children and pets, a safe distance away during operation․ Never allow untrained individuals to operate the mower․
Crucially, disconnect the spark plug wire before performing any maintenance or adjustments․ Wear appropriate safety gear, including eye protection and sturdy footwear․ Avoid operating the mower in wet conditions or near flammable materials․
Be aware of potential hazards like thrown objects․ Never alter or disable safety features․ Familiarize yourself with the meaning of safety alert symbols: DANGER, WARNING, and CAUTION․
General Safety Rules
Operate the Hyper Tough mower responsibly․ Inspect the lawn for stones, toys, or other objects that could become projectiles․ Ensure adequate lighting when mowing, and never operate the mower if you are tired or under the influence of drugs or alcohol․
Maintain a firm grip on the handle during operation, and walk, never run, while mowing․ Avoid sharp turns or slopes․ Always shut off the engine before leaving the mower unattended, even briefly․
Proper clothing is essential – avoid loose garments․ Be mindful of exhaust fumes; operate the mower only in well-ventilated areas․ Regularly inspect the mower for damage and address any issues promptly․
Specific Safety Alerts (Danger, Warning, Caution)
DANGER: Rotating blade poses a severe risk of amputation․ Keep hands and feet away from the cutting area at all times․ Never attempt to clear a clogged discharge chute while the engine is running․
WARNING: Exhaust fumes contain carbon monoxide, a deadly gas․ Operate the mower outdoors only․ Fuel is flammable; store it in an approved container away from heat and open flames․
CAUTION: Before each use, inspect the blade for damage or wear․ A dull or damaged blade can lead to uneven cutting and increased risk of injury․ Always disconnect the spark plug wire before performing any maintenance or repairs․

Assembly & Setup
Proper assembly is crucial for safe operation․ This section details unboxing, handle attachment, height adjustment, and fluid level checks for your mower․
Unboxing and Parts Identification
Carefully unpack your Hyper Tough 20-inch lawn mower and verify all components are present․ The box should contain the mower itself, the handle, a hardware packet (bolts, washers, and nuts), the operator’s manual, and potentially a blade key․ Inspect each part for any shipping damage before proceeding․
Key components include the mower deck, engine, wheels, discharge chute, and height adjustment levers․ Refer to the parts diagram (found later in this manual) to familiarize yourself with the location and names of each part․ Ensure you have all necessary tools – typically a wrench and screwdriver – readily available․ Missing parts? Contact Walmart customer support or refer to the warranty information for assistance․ Proper identification now will streamline the assembly process․
Attaching the Handle
Begin by positioning the handle correctly, aligning it with the designated mounting points on the mower deck․ Use the provided bolts, washers, and nuts from the hardware packet to secure the handle firmly in place․ Ensure the handle is tightened sufficiently to prevent wobbling during operation, but avoid over-tightening, which could damage the mounting points․
Follow the diagrams in the manual for correct bolt placement․ Some models may have adjustable handle positions; select your preferred height before fully tightening․ Double-check all connections to guarantee stability․ A securely attached handle is crucial for safe and comfortable maneuvering of the mower․ Proper installation contributes significantly to the overall control and usability of your Hyper Tough mower․
Adjusting the Cutting Height

Your Hyper Tough 20-inch mower features multiple cutting height positions, allowing you to customize the grass length․ Locate the height adjustment levers, typically found near each wheel․ These levers control the position of the wheels relative to the mower deck․
To raise the cutting height, move the levers forward; to lower it, move them backward․ Ensure all four wheels are set to the same height for an even cut․ Refer to the height indicators on the mower deck to select your desired setting․ Start with a higher setting for the first cut, especially if the grass is tall, and gradually lower it as needed․ Regularly adjusting the height optimizes performance and lawn health․
Checking Oil and Fuel Levels
Maintaining proper oil and fuel levels is crucial for engine performance and longevity․ Before each use, check the oil level using the dipstick, ensuring it falls within the “full” range․ Add oil as needed, using the type specified in the manual – typically SAE 30․ Always check the oil with the mower on a level surface․
For fuel, use fresh, unleaded gasoline with an octane rating of 87 or higher․ Carefully remove the fuel cap and check the fuel level visually․ Do not overfill the tank, leaving some space for expansion․ Avoid spilling fuel and wipe up any spills immediately․ Regular checks prevent engine damage and ensure reliable operation․

Operation Instructions
Follow these instructions to safely and effectively operate your Hyper Tough 20-inch mower, achieving a well-maintained lawn with each use․
Starting the Engine
Before attempting to start the engine, ensure the mower is on a level surface and the blade is disengaged․ Verify the fuel tank contains fresh gasoline and the oil level is adequate, referencing the ‘Checking Oil and Fuel Levels’ section if needed․
Prime the engine by pressing the primer bulb 3-5 times – do not over-prime․ Move the choke lever to the ‘CHOKE’ position, especially for cold starts․ Grasp the handle firmly and engage the blade control lever․
Pull the starter rope with a smooth, firm motion․ If the engine doesn’t start after several attempts, allow the rope to retract fully before pulling again․ Once started, gradually move the choke lever to the ‘RUN’ position as the engine warms up․ Always maintain a secure grip on the handle during operation․
Proper Mowing Techniques
For a healthy and well-maintained lawn, overlap each mowing pass by a few inches to prevent scalping and ensure even cutting․ Adjust the cutting height according to your grass type and desired lawn appearance, utilizing the adjustable height settings․
Avoid mowing wet grass, as it can clog the discharge chute and lead to an uneven cut․ When mowing tall grass, raise the cutting height and make multiple passes, gradually lowering the height with each pass․
Walk at a comfortable pace, allowing the mower to effectively cut the grass․ Be mindful of obstacles and adjust your mowing pattern accordingly․ Regularly empty the grass catcher to maintain optimal performance and prevent clogging․
Stopping the Engine
To safely stop the engine, first disengage the blade by releasing the blade control handle on the mower handle․ This prevents accidental engagement while maneuvering․ Allow the engine to slow down before proceeding to the next step․
Next, move the throttle control to the ‘STOP’ position․ This cuts off the fuel supply to the engine, bringing it to a complete halt․ Ensure the blade has completely stopped rotating before approaching the mower․
Finally, disconnect the spark plug wire to prevent accidental starting during storage or maintenance․ Always follow these steps in sequence for a safe and controlled engine shutdown․
Dealing with Obstacles
When encountering obstacles like rocks, roots, or larger debris while mowing, it’s crucial to slow down and carefully maneuver around them․ Avoid attempting to power through, as this could damage the blade or the mower deck․
If an obstacle is unavoidable, immediately disengage the blade control handle to stop the blade rotation․ Then, carefully inspect the area and remove the obstacle before resuming mowing․ Always wear appropriate safety gloves during this process․
Remember to raise the cutting height when mowing uneven terrain to minimize the risk of scalping or damaging the lawn․ Prioritize safety and avoid forcing the mower over difficult obstacles․
Maintenance & Care
Regular upkeep, including oil changes, blade sharpening, and filter cleaning, is vital for maintaining peak performance and extending the life of your mower;
Regular Maintenance Schedule
To ensure the longevity and efficient operation of your Hyper Tough 20-inch lawn mower, adhering to a consistent maintenance schedule is crucial․ Before each use, visually inspect the mower for any loose parts, damage, or fuel leaks․ After every five hours of operation, clean the mower deck, removing grass clippings and debris to prevent corrosion․
Every 25 hours, check the air filter and clean or replace it as needed․ Annually, or after 100 hours of use, change the engine oil and replace the spark plug․ Sharpen or replace the blade annually, or more frequently if you encounter rocks or other hard objects․ Periodically, inspect and tighten all bolts and fasteners․ Following this schedule will help maintain optimal performance and prevent costly repairs․
Oil Change Procedures
To change the oil in your Hyper Tough 20-inch mower, first, ensure the engine is warm, but not hot․ Locate the oil drain plug, typically found on the lower part of the engine․ Position an approved oil drain pan beneath the plug․ Remove the plug and allow all the old oil to drain completely․
Reinstall the drain plug, ensuring it’s tightened securely․ Remove the oil fill cap and add the recommended amount of new oil, specified in your owner’s manual – typically around 15-20 ounces․ Check the oil level with the dipstick, adding more if needed․ Dispose of the used oil responsibly at a designated recycling center․
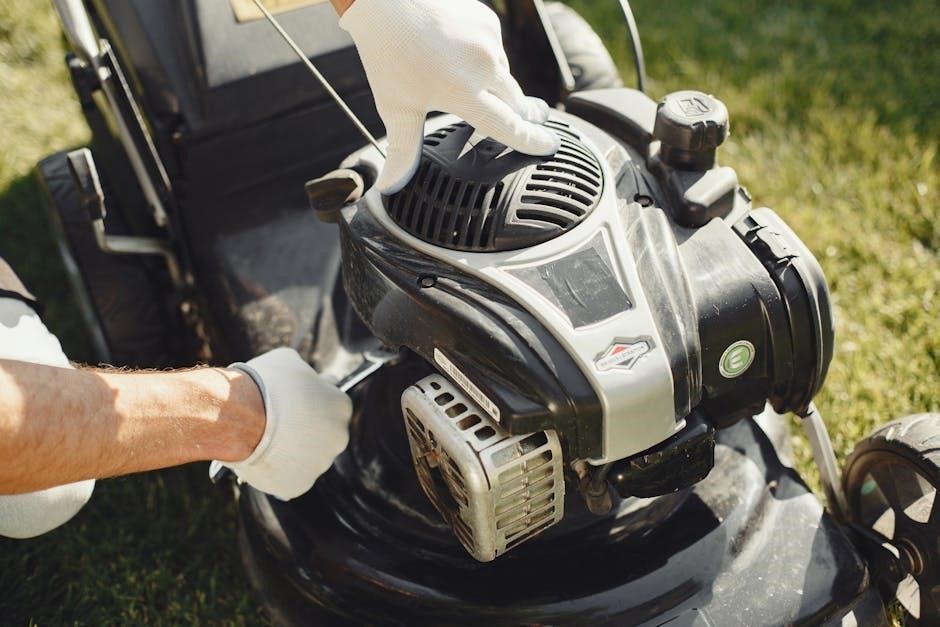
Spark Plug Replacement
To replace the spark plug on your Hyper Tough 20-inch mower, first disconnect the spark plug wire․ Use a spark plug socket to carefully remove the old spark plug․ Inspect the new spark plug for damage and ensure it has the correct gap, referencing your owner’s manual for specifications․
Thread the new spark plug into the engine by hand to avoid cross-threading․ Tighten the spark plug with the spark plug socket, but do not overtighten․ Reconnect the spark plug wire securely․ A faulty spark plug can cause starting issues or poor engine performance, so regular replacement is crucial for optimal operation․
Air Filter Cleaning/Replacement
Maintaining a clean air filter is vital for your Hyper Tough 20-inch mower’s engine health․ Locate the air filter housing and remove the cover․ Inspect the filter; if it’s lightly dirty, gently tap it to remove debris or use compressed air, blowing from the inside out․
For heavily soiled or damaged filters, replacement is necessary․ Install the new air filter, ensuring a proper seal․ Reattach the air filter cover securely․ A clogged air filter restricts airflow, leading to reduced power and increased fuel consumption․ Regular cleaning or replacement ensures efficient engine operation and prolongs its lifespan․
Blade Sharpening & Replacement
A sharp blade is crucial for a clean cut and healthy lawn․ Disconnect the spark plug wire before any blade work! Remove the blade using a wrench, noting its orientation․ Sharpen the blade using a file or grinding wheel, maintaining the original angle․ Ensure balanced sharpening to prevent vibration․
If the blade is severely damaged or worn, replace it with a new one․ Install the new blade correctly, tightening the bolt to the manufacturer’s specified torque․ Inspect the blade adapter for damage and replace if needed․ A dull or damaged blade tears grass, causing it to brown and become susceptible to disease․
Troubleshooting Common Issues
This section details solutions for typical problems like starting difficulties, excessive vibration, uneven cuts, and discharge chute blockages, ensuring smooth operation․
Engine Won’t Start
If your Hyper Tough 20-inch mower’s engine fails to start, several factors could be at play․ First, verify the fuel tank isn’t empty and that the fuel shut-off valve (if equipped) is open․ Check the spark plug; a fouled or damaged plug won’t ignite the fuel-air mixture․ Ensure the spark plug wire is securely connected․
Next, examine the air filter – a clogged filter restricts airflow․ Confirm the safety bail is fully engaged during starting attempts․ Low oil levels can trigger a safety shut-off; check the oil dipstick and add oil if needed․ If the engine cranks but doesn’t fire, the carburetor might require cleaning or adjustment․ Finally, stale fuel can cause starting issues; consider draining and replacing it with fresh gasoline․
Mower Vibrates Excessively
Excessive vibration during operation of your Hyper Tough 20-inch mower indicates a potential issue requiring immediate attention․ First, inspect the blade for damage – a bent or unbalanced blade is a common cause․ Ensure the blade is securely fastened to the mower deck with the correct hardware․ Check for loose components, such as the engine mounting bolts or the handle assembly, and tighten them as needed․
Worn or damaged engine components, like the crankshaft or flywheel, can also contribute to vibration․ Inspect the mower deck for any debris or obstructions that might be causing imbalance․ If the vibration persists after these checks, professional servicing is recommended to diagnose and address underlying mechanical problems․
Uneven Cut
An uneven cut with your Hyper Tough 20-inch mower often points to a few key areas needing inspection․ Begin by checking the blade’s sharpness; a dull blade tears grass instead of cutting cleanly․ Ensure the blade is properly installed, with the cutting edge facing the correct direction․ Verify the tire pressure is even on all wheels, as uneven pressure can cause the deck to tilt․
Adjusting the cutting height to a more suitable setting for your lawn’s conditions can also resolve this issue․ Check for obstructions under the deck, like accumulated grass clippings․ Finally, ensure you’re maintaining a consistent walking pace during mowing for a uniform result․
Discharge Chute Problems
Issues with the discharge chute on your Hyper Tough 20-inch mower typically involve clogging or improper discharge․ Begin by ensuring the chute is securely attached and free from any physical damage․ If clogging occurs, always stop the engine and disconnect the spark plug wire before attempting to clear the obstruction․ Wet grass is a common culprit, so try mowing when the grass is drier․
Check for debris, such as sticks or leaves, blocking the chute’s opening․ Ensure the discharge deflector is properly positioned to direct the clippings away from you and bystanders․ A restricted airflow can also cause problems; inspect the area around the deck for any obstructions hindering airflow․

Parts Diagram & Replacement
Locate specific components using the detailed diagram provided, facilitating easy identification for ordering genuine Hyper Tough replacement parts when needed for repairs․
Locating Parts in the Diagram
The parts diagram is a crucial resource for identifying components of your Hyper Tough 20-inch lawn mower․ Each part is assigned a unique reference number, clearly labeled on the diagram itself․ To effectively use the diagram, begin by identifying the assembly you’re working with – for example, the engine assembly, the deck assembly, or the handle assembly․
Once you’ve located the assembly, carefully examine the diagram for the specific part you need․ The corresponding reference number will be listed alongside the part’s name in the parts list․ Pay close attention to any variations or sub-components, as these will also have their own unique numbers․ Understanding this numbering system is key to accurate parts identification and ordering․ Refer to the diagram frequently during maintenance or repair procedures․
Ordering Replacement Parts
To order replacement parts for your Hyper Tough 20-inch lawn mower, you’ll need the part number as identified in the parts diagram․ Walmart is the primary retailer for Hyper Tough products, so their website (Walmart․com) is the first place to check for availability․ You can search by part number or browse through the lawn mower parts section․
Alternatively, you may find parts available through online retailers specializing in lawn mower components․ When ordering, double-check the part number and ensure it’s compatible with your specific mower model․ Providing the mower’s serial number can further guarantee you receive the correct replacement․ Keep records of your orders for warranty purposes․

Warranty Information
Your Hyper Tough mower is covered by a manufacturer’s warranty against defects in materials and workmanship for a specified period; review details carefully․
Warranty Coverage Details
The Hyper Tough 20-inch lawn mower warranty typically covers defects in materials and workmanship under normal residential use․ This coverage begins on the original purchase date․ Specifically, the engine, often a Briggs & Stratton, may have a separate warranty directly from them, potentially extending beyond the mower’s overall warranty․
The frame is usually covered for a defined period, protecting against breakage or significant structural flaws; However, wear items – like blades, belts, and air filters – are generally excluded, as their lifespan is dependent on usage and maintenance․ Damage resulting from improper maintenance, accidents, or commercial use will also void the warranty․
Keep your original purchase receipt as proof of date and location of purchase; it’s crucial for any warranty claim․ Carefully review the full warranty statement included with your mower for precise terms and conditions․
How to Make a Warranty Claim
To initiate a warranty claim for your Hyper Tough 20-inch lawn mower, first, gather your original purchase receipt and the mower’s model and serial number․ Contact Walmart’s customer service department, as Hyper Tough is a Walmart exclusive brand․ They will guide you through the initial claim process and may request photos or videos documenting the defect․
Depending on the issue, you might be asked to bring the mower to a local Walmart or an authorized service center; If the engine is under a separate Briggs & Stratton warranty, you may need to contact them directly․
Retain all documentation related to your claim, including communication records and repair orders․ Be prepared to describe the problem in detail and cooperate with any investigation․