
panasonic bread maker user guide
Welcome to the Panasonic Bread Maker‚ a versatile and easy-to-use appliance designed to help you create delicious homemade bread effortlessly․ With its intuitive interface‚ customizable settings‚ and preset programs‚ this bread maker simplifies the baking process for both novices and experienced bakers․ Perfect for crafting fresh‚ aromatic loaves‚ it offers a wide range of options to suit your preferences and dietary needs‚ ensuring every slice is a delight․
Overview of the Panasonic Bread Maker
The Panasonic Bread Maker is an automatic bread-making appliance designed to simplify the process of creating fresh‚ homemade bread․ With its advanced features‚ it offers a variety of preset programs and customizable settings to suit different bread types and preferences․ Equipped with a non-stick bread pan and kneading blade‚ it ensures even mixing and baking․ The machine also features a yeast dispenser for precise fermentation and a delay start timer for added convenience․ Its user-friendly interface makes it accessible for both beginners and experienced bakers‚ while its compact design fits seamlessly into any kitchen․ Whether you’re making classic loaves‚ gluten-free bread‚ or specialty recipes‚ the Panasonic Bread Maker delivers consistent results with minimal effort․
Benefits of Using a Panasonic Bread Maker
Using a Panasonic Bread Maker offers numerous benefits‚ including the ability to create fresh‚ homemade bread with minimal effort․ It features preset programs for various bread types‚ allowing for effortless customization․ The machine’s advanced yeast dispenser ensures precise fermentation‚ while the delay start timer enables baking to suit your schedule․ Its intuitive interface makes it user-friendly for all skill levels‚ and the ability to craft gluten-free‚ whole-grain‚ and specialty breads caters to diverse dietary needs․ This appliance combines convenience‚ versatility‚ and consistent results‚ making it a valuable addition to any kitchen․
Safety Instructions
Always keep the bread maker on a stable‚ heat-resistant surface and avoid touching hot surfaces or moving parts during operation․ Never remove the bread pan while in use‚ as it may cause burns․ Ensure children are kept away from the appliance while it is operating․ Follow all safety guidelines provided in the user manual to ensure safe and effective use․
General Safety Precautions
To ensure safe operation‚ always place the bread maker on a stable‚ heat-resistant surface away from flammable materials․ Avoid touching the appliance’s hot surfaces or moving parts during operation․ Never leave the bread maker unattended while it is in use․ Keep children away from the appliance to prevent accidents․ Avoid overloading the bread pan‚ as this can lead to uneven cooking or damage․ Always follow the manufacturer’s guidelines for ingredient quantities and usage․ Regularly clean and maintain the appliance to prevent malfunctions․
Electrical Safety Guidelines
Always use the bread maker with the provided power cord and plug․ Ensure the appliance is connected to a grounded electrical outlet to prevent shocks․ Avoid using damaged cords or loose connections․ Keep the bread maker away from water to prevent electrical hazards․ Do not submerge any part of the appliance in water․ If the device malfunctions‚ unplug it immediately and contact customer support․ Never attempt repairs yourself․ Follow all local electrical safety standards for safe operation․
Parts and Accessories Identification
Familiarize yourself with the bread maker’s components‚ including the bread pan‚ kneading blade‚ and control panel․ Accessories like measuring cups and recipe books are often included․
External Components of the Bread Maker
The Panasonic Bread Maker features a durable exterior with a user-friendly control panel‚ including buttons for selecting programs and adjusting settings․ The lid allows easy access to the bread pan‚ while the viewing window lets you monitor the baking process․ The handle provides convenient mobility‚ and the non-slip base ensures stability during operation․ Exterior components are designed for ease of use and durability‚ ensuring long-lasting performance and effortless bread-making experiences․
Internal Components and Their Functions
The internal components of the Panasonic Bread Maker include the bread pan‚ kneading blade‚ and heating element․ The bread pan is non-stick‚ ensuring easy loaf removal‚ while the kneading blade mixes and kneads dough evenly․ The heating element distributes heat for consistent baking․ These components work together to automate the bread-making process‚ from mixing to baking‚ delivering perfectly cooked loaves with minimal effort․ Regular maintenance of these parts ensures optimal performance and longevity of the appliance․

Basic Operations
Place the bread maker on a stable surface‚ plug it in‚ and ensure all parts are secure․ Add ingredients‚ select your desired settings‚ and start the process for fresh‚ homemade bread․
Placing the Bread Maker on a Suitable Surface
To ensure safe and optimal performance‚ place the Panasonic Bread Maker on a stable‚ dry‚ clean‚ and flat surface․ Choose a heat-resistant countertop away from direct sunlight or heat sources like ovens․ Avoid placing it near flammable materials or water sources to prevent accidents․ Ensure the surface is level to maintain balance during operation․ Keep the area around the bread maker clear to allow proper ventilation and easy access․ Always follow the manufacturer’s guidelines for placement to guarantee safety and efficiency․
Removing and Reinstalling the Bread Pan
To remove the bread pan‚ open the lid and turn the pan anticlockwise until it comes loose․ Carefully lift it out‚ ensuring the kneading blade remains attached․ For reinstalling‚ align the pan with the machine’s base and twist it clockwise until it clicks securely․ Always handle the pan with care‚ especially when it’s hot‚ to avoid burns․ Regularly cleaning the pan and blade after use helps maintain hygiene and optimal performance․ Follow these steps to ensure proper functionality and longevity of your bread maker․
Adding Ingredients to the Bread Pan
Start by removing the bread pan and kneading blade․ Add ingredients in the specified order: liquids first‚ followed by dry ingredients like flour‚ yeast‚ and any optional additions․ Ensure all ingredients are evenly distributed․ If your model has a yeast dispenser‚ place the yeast there․ Avoid overfilling to prevent spills during mixing․ Once all ingredients are added‚ reinstall the pan and blade‚ ensuring they are securely locked․ This step is crucial for proper mixing and baking results․ Always refer to your recipe for precise measurements and guidelines․
Programming and Settings
The Panasonic Bread Maker offers preset programs and manual settings for customizable baking․ With 20 preset options‚ you can easily make various bread types․ Manual mode allows precise control‚ catering to specific recipes and preferences‚ ensuring every loaf meets your expectations․ Intuitive buttons and a clear display make navigation simple‚ perfect for both novice and experienced bakers alike․
Understanding Preset Programs
The Panasonic Bread Maker features 20 preset programs designed to simplify bread-making․ These include options for basic bread‚ whole wheat‚ French bread‚ and more․ Each program automatically adjusts cooking time‚ temperature‚ and mixing cycles to ensure perfect results․ Additional settings like dough‚ rise‚ and bake phases provide flexibility․ Users can also customize crust color and delay start times․ Preset programs eliminate guesswork‚ making it easy to achieve professional-quality loaves with minimal effort․ Explore the variety of programs to suit your baking preferences and dietary needs․
Using Manual Settings for Custom Recipes
For those who enjoy experimenting‚ the Panasonic Bread Maker offers manual settings that allow you to tailor recipes to your preferences․ Adjust kneading time‚ rise cycles‚ and baking temperature to suit your dough․ This feature is ideal for unique ingredients or dietary needs․ Manual mode provides full control over the bread-making process‚ enabling you to craft personalized loaves․ Experiment with different combinations to achieve the perfect texture and flavor․ This flexibility makes the appliance versatile for both traditional and innovative bread recipes․

Customizing Your Bread
Easily tailor your bread to perfection with adjustable settings for loaf size‚ crust color‚ and delay start․ Customize recipes to suit your taste preferences and dietary needs effortlessly․
Adjusting Loaf Size and Crust Color
The Panasonic Bread Maker offers customizable options for loaf size and crust color‚ ensuring your bread is baked to your exact preferences․ Choose from small‚ medium‚ or large loaf sizes to suit your needs․ Crust color can be set to light‚ medium‚ or dark‚ allowing you to achieve the perfect texture and appearance․ These adjustments are easily made using the intuitive control panel‚ giving you complete control over your bread-making experience․ This feature enhances flexibility and ensures consistent results every time you bake․
Setting the Delay Start Timer
The Panasonic Bread Maker features a convenient delay start timer‚ allowing you to schedule your bread-making process up to 13 hours in advance․ This feature is perfect for preparing ingredients in the evening and waking up to freshly baked bread․ Simply use the control panel to set your preferred start time‚ and the machine will automatically begin mixing‚ kneading‚ and baking at the designated hour․ The delay start timer adds flexibility to your baking routine‚ ensuring your bread is ready exactly when you need it․
Troubleshooting Common Issues
Encounter issues? Refer to the user manual for solutions․ Common problems include improper dough formation or machine malfunction․ Consult error codes or contact Panasonic support for assistance․
Identifying and Resolving Common Errors
Identify common errors by checking error codes or unusual machine behavior․ Issues like the kneading blade not moving or uneven bread formation can often be resolved by cleaning or adjusting parts․ Ensure the bread pan is properly aligned and secured․ If the machine overheats‚ unplug it and let it cool․ For persistent problems‚ consult the user manual or contact Panasonic customer support for assistance․ Regular maintenance and proper usage can prevent many issues‚ ensuring optimal performance and delicious results․
Understanding Error Codes
Understanding error codes is crucial for troubleshooting your Panasonic Bread Maker․ Common codes like “E01” or “E02” indicate specific issues‚ such as a faulty kneading blade or overheating․ Refer to your user manual for a detailed list of codes and their meanings․ If an error occurs‚ turn off the machine‚ unplug it‚ and allow it to cool before restarting․ For persistent issues‚ contact Panasonic support for professional assistance․ Regular maintenance and proper usage can help minimize errors and ensure smooth operation․ Always follow the manufacturer’s guidelines for resolving these issues effectively․
Maintenance and Cleaning
Regularly clean the bread maker’s exterior with a damp cloth and mild detergent․ Avoid harsh chemicals or abrasive cleaners․ For the bread pan and kneading blade‚ wash by hand with warm soapy water after each use․ Dry thoroughly to prevent rust․ Periodically check and clean the interior for leftover flour or dough residue to maintain optimal performance and hygiene․
Cleaning the Bread Maker Exterior
To maintain your Panasonic Bread Maker’s appearance and functionality‚ regularly clean the exterior․ Use a soft‚ damp cloth with a mild detergent to wipe down the surface‚ avoiding harsh chemicals or abrasive cleaners; Never immerse the unit in water or expose it to excessive moisture․ For stubborn stains‚ gently scrub with a non-abrasive sponge․ After cleaning‚ dry the exterior thoroughly with a clean cloth to prevent water spots․ Always unplug the bread maker before cleaning for safety․
Maintaining the Bread Pan and Kneading Blade
Regularly clean the bread pan and kneading blade to ensure optimal performance․ Wash the bread pan by hand using mild soap and warm water; avoid abrasive cleaners or scourers․ Dry thoroughly after washing to prevent rust․ For the kneading blade‚ remove any dough residue with a soft brush or damp cloth․ Avoid soaking the blade in water for extended periods․ Inspect both parts for wear and tear‚ replacing them if damaged․ Proper maintenance ensures consistent bread quality and extends the lifespan of your Panasonic Bread Maker․
Advanced Features
The Panasonic Bread Maker includes advanced features like a yeast dispenser for precise distribution and customizable settings for adding ingredients like nuts or seeds‚ enhancing versatility and precision․
Using the Yeast Dispenser
The Panasonic Bread Maker features an automatic yeast dispenser‚ designed to release yeast at the optimal time during the dough cycle․ This ensures perfect activation and even distribution‚ eliminating the need for manual timing․ Simply add the yeast to the dispenser before starting the program‚ and the machine will handle the rest․ This feature enhances fermentation accuracy‚ resulting in lighter‚ airier bread․ It’s a convenient option for achieving professional-quality loaves with minimal effort․ Always use the recommended yeast type for best results‚ as specified in the manual․
Customizing Recipes with Additional Ingredients
Enhance your bread-making experience by incorporating additional ingredients like nuts‚ seeds‚ herbs‚ or cheese․ The Panasonic Bread Maker allows you to customize recipes effortlessly․ Use the automatic dispenser for ingredients like yeast or nuts‚ ensuring they’re added at the right time․ For manual additions‚ choose the appropriate program and add ingredients during the mixing phase․ Experiment with unique combinations to create signature loaves․ Always measure ingredients accurately and adjust quantities to avoid overloading the machine․ This feature makes it easy to personalize your bread to suit any taste or dietary preference․

Recipe Ideas
Explore a variety of delicious recipes‚ from classic white bread to hearty whole-grain and gluten-free options․ Experiment with sweet breads‚ herbed loaves‚ and nutty creations for unique flavors and textures․
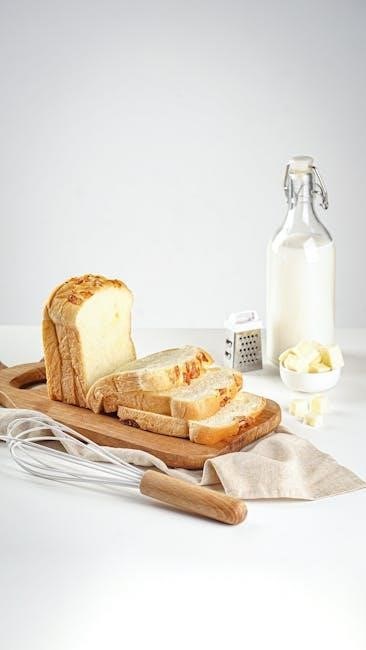
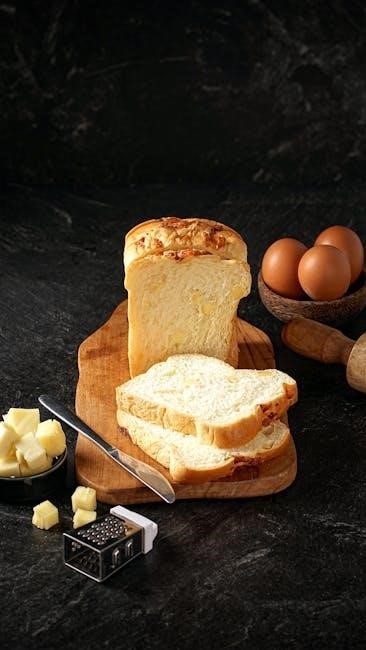
Basic Bread Recipes
Start with classic recipes like white bread‚ whole-grain‚ or rye‚ using the Panasonic Bread Maker’s preset programs for perfect results․ Measure ingredients precisely‚ add yeast‚ and let the machine do the work․ The included measuring cup and spoon ensure accuracy‚ while the non-stick pan and kneading blade handle mixing and baking effortlessly․
The user manual provides clear instructions and recipes‚ making it easy for beginners and experienced bakers alike to craft fresh‚ aromatic loaves․ Customize recipes to suit your taste preferences for a homemade touch every time․
Specialty and Gluten-Free Recipes
Elevate your baking with the Panasonic Bread Maker by exploring specialty recipes like sourdough‚ gluten-free‚ or herb-infused breads․ For gluten-free options‚ substitute traditional flour with almond‚ coconut‚ or rice flour‚ ensuring the right texture and flavor․ The machine’s customizable settings allow precise control over rising and baking times‚ essential for gluten-free dough․ Use the delay timer to prepare ingredients overnight and wake up to freshly baked bread‚ perfectly tailored to your dietary needs and preferences․
FAQs
Discover answers to common questions about the Panasonic Bread Maker‚ from troubleshooting tips to achieving perfect loaves․ Addressing user concerns and optimizing your baking experience effectively․

Common Questions About the Panasonic Bread Maker
This section addresses common queries about the Panasonic Bread Maker‚ ensuring a smooth and enjoyable baking experience․ Users often ask about operation‚ maintenance‚ and troubleshooting․ Questions include: “How do I clean the bread maker?” “Can I leave it unattended during operation?” and “Why isn’t my bread rising properly?” Detailed answers provide solutions and tips‚ helping you resolve issues and achieve perfect loaves every time․ Refer to your manual for specific guidance tailored to your model․
Tips for Achieving Perfect Loaves
For impeccable results‚ use fresh yeast and ensure accurate measurements․ Preheat the machine if needed‚ and avoid overmixing dough․ Select the right flour type for your recipe‚ as strong flour yields better structure․ Monitor crust color settings and adjust based on preference․ Allow the machine to cool between batches and clean parts regularly․ Experiment with ingredients like herbs or nuts for variety․ Always follow the user manual’s guidelines for optimal performance and consistent results․
Warranty and Support
The Panasonic Bread Maker is backed by a one-year warranty‚ ensuring coverage for repairs and replacements․ Dedicated support is available through Panasonic’s official website‚ including online resources‚ FAQs‚ and contact options for assistance․
Understanding Your Warranty Coverage
Your Panasonic Bread Maker is protected by a comprehensive one-year warranty‚ covering manufacturing defects and ensuring reliable performance․ The warranty period begins from the date of purchase and includes repairs or replacements free of charge for faulty parts or labor․ For detailed terms and conditions‚ refer to the warranty document provided with your product․ Registering your appliance on Panasonic’s official website can also enhance your support experience and ensure seamless service․ Always retain your proof of purchase for warranty claims․
Contacting Panasonic Customer Support
For any inquiries or issues with your Panasonic Bread Maker‚ contact our dedicated customer support team․ Visit the official Panasonic website to find support options‚ including live chat‚ phone assistance‚ and email․ You can also download user manuals‚ FAQs‚ and troubleshooting guides directly from the site․ Phone support is available during business hours‚ and emails are typically responded to within 24-48 hours․ Additionally‚ registered users can access exclusive support resources․ For prompt assistance‚ have your product model number and purchase details ready․
Your Panasonic Bread Maker is a versatile tool for creating delicious homemade bread․ With proper care and use‚ it will provide years of baking satisfaction․ Enjoy experimenting with new recipes and settings to craft the perfect loaf every time․ Happy baking!
Final Tips for Getting the Most Out of Your Bread Maker
To maximize your Panasonic Bread Maker’s potential‚ experiment with diverse recipes and ingredients to create unique bread varieties․ Regularly clean the appliance to maintain performance and hygiene․ Utilize the delay timer for fresh bread ready at your convenience․ Adjust settings like crust color and loaf size to tailor results to your preferences․ Store ingredients properly and ensure accurate measurements for consistent outcomes․ Explore manual settings for custom recipes and enjoy the versatility of your machine for years of baking satisfaction․